The Repair Shop's best tricks to keeping household items in tip-top form
Everybody has something that means too much to be thrown away – and that’s where The Repair Shop comes in.
In the modern era it is often a case of “out with the old, in with the new”, as our throwaway society dictates that it is easier to bin something than resurrect or rejuvenate it.
The days of tinkering with things seem to be long gone.
Many people are daunted, probably feeling that they don’t have the know-how as old-style crafts, once handed down through generations, are being lost for the sake of hectic diaries and cheap retail.
However, The Repair Shop and its resident experts are ready and willing to help.
Our conservators and restorers become absorbed in their tasks, happy to spend hours and days on a quest to achieve a flawless outcome.
Furniture restorer William Kirk calls it “the workshop of dreams” – and not just for the people hoping to see their beloved items transformed.
He and the rest of the experts are also living the dream, fixing a vast range of artefacts that might not otherwise come to their work benches.
And the tale behind each item can be just as compelling as the conservation or restoration process.
Critically, the team aren’t refurbishing antique investments so the owners can cash in, but are putting a piece of family history back into place.
Here, we offer help to people who don’t have years of experience behind them like The Repair Shop experts.
However they might share the same goals: to retrieve objects from dusty boxes, restore them to a former glory and safeguard them as a legacy to pass on to future generations.
With bags and briefcases, a timely stitch will either effect a temporary repair – to stop it getting worse before professional help – or fix it so it is ready for use again.
1 Assemble everything you need. The problem has started with worn thread, so the first thing to locate is a heavy-duty one which you will find on sale in tack shops or at shoe repairers. In addition, you will need a blunt end needle – which is typically stubby with a large eye – a piece of beeswax and a pair of scissors.
2 Pull out all the loose thread and, if it’s possible, knot it with the thread ends still attached to the bag to stop it unravelling further.
3 Cut a piece of thread long enough to go two and a half times the gap that needs sewing.
4 Run the thread through a piece of beeswax so it’s better protected as it is pulled through the leather.
5 Using existing holes, thread up the needle and start by pulling the thread through the first hole for half of its length.
6 Start sewing using each hole, with this half of the thread, in a running stitch, pulling the thread tight.
7 At the end of the line of stitches, unthread the needle and return to the unused half-length of thread. Now use this to stitch in reverse. When it’s complete there should running stitches between holes on both sides of the seam and loose thread on each side.
8 To finish, stitch one hole backwards so the threads are the same side. Sew one of the threads back one hole and the other back two holes to lock the stitches in place so you don’t have to made a knot, and trim the threads.
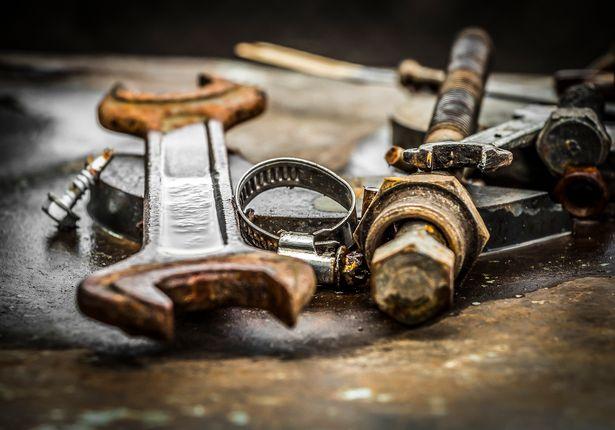
1 If an old tool hasn’t been used for a long time and has seized up, soak it in a mix of acetone and automatic transmission fluid for a few days to free up the internal mechanism.
2 With a small rusty item, like a tool, leave it to soak in white vinegar to kick-start the de-rusting process.
3 Afterwards, use a pad of wire wool in conjunction with a lubricating oil to tackle the rust that’s still clinging to it. Wire wool comes in numerous different grades, with 4 being coarse and 0000 super fine. It’s advisable to start with a fine mesh and graduate upwards.
4 If the rust remains stubborn, there are further options, ranging from a nylon-bristled toothbrush, through brass and steel brushes to an angle-grinder attachment.
5 With chrome, use one of the least abrasive wire wools with lubricating oil. The presence of rust indicates the chrome plating has broken down, revealing the steel below. In order to stem rust for good it needs to be professionally re-plated, but you can delay that by putting on a protective coat of wax.
Although the specialist equipment necessary for major metalwork projects is beyond ordinary households, some items can still be stripped down at home.
Here, The Repair Shop’s metalworker Dominic Chinea signposts some of the best ways forward.
DO take photographs, measurements and even drawings of your item before you begin a refurbishment project. Document everything that might help when it comes to re-assembly.
Don’t forget to use protective gear and clothing.
DO label everything as you take items apart. Put screws in named bags, for example, and use paper tags on larger items to avoid any confusion in the future.
Don’t use the wrong type of paint. For example, restored items staying outdoors need the protection of exterior paint and will deteriorate without it.
DO think outside the box when you undertake repairs and use different component parts, if necessary. When Dom fixed a spinning barber’s pole, he discovered the manufacturers used a motor from a gramophone.
Don’t skimp on preparation. Procedures like cleaning and sanding down may seem tediously repetitive, but any compromises taken here will be visible in the end result.
Don’t use excess paint in the hope of hiding areas that haven’t been properly prepared. Layers of shiny paint will only amplify any outstanding issues.
Do create a template out of cardboard or wood if you are making or designing a new part for an item, to make sure that your planned addition will fit.
1 Take an unshelled walnut and, with moderate pressure, rub it in circular motions over the scratch.
2 Rub the same area with your fingers afterwards, to warm up the nut oil that has been left on the furniture’s surface.
3 Wait for a few moments for the oil to seep in and buff with a soft cloth. Having been filled and coloured, the scratched area will no longer be visible.
1 A white mark means there’s moisture trapped in the wood. Apply mayonnaise to the affected area and leave overnight so it can draw the offending water out.
2 Clean with a cloth and buff. This will work for surface marks. Indentation can only be fixed by re-polishing.
3 Invest in some coasters as they are the single best way to protect furniture from ring marks.
Do you have a story to sell? Get in touch with us at webcelebs@trinitymirror.com or call us direct 0207 29 33033.

